Cheese balls are one of those irresistible snacks that are perfect for parties, game nights, or even as a cozy snack at home. Golden, crispy on the outside, and gooey and cheesy on the inside, these bite-sized delights are loved by both kids and adults alike. Making them at home is easier than you think, and the results are far superior to store-bought versions—fresh, flavorful, and customizable.
Whether you’re serving them as an appetizer or a snack with your favorite dipping sauce, homemade cheese balls always disappear fast. Their combination of melted cheese, crispy coating, and perfect seasoning makes them simply addictive.
Why You’ll Love This Recipe
Cheese balls are a crowd-pleaser because of their crispy exterior and creamy, cheesy interior. They’re also highly versatile—you can experiment with different cheeses, add herbs or spices, or make them spicy for an extra kick.
This recipe is straightforward, uses simple ingredients, and allows you to make them fresh in under an hour. Plus, they’re easy to freeze and reheat, making them perfect for entertaining or meal prep.
Ingredients
For the Cheese Balls:
- 2 cups grated cheddar cheese (or mix of cheddar and mozzarella)
- 1 cup boiled and mashed potatoes
- ½ teaspoon salt
- ½ teaspoon black pepper
- ½ teaspoon paprika or chili powder (optional)
- 1 teaspoon garlic powder (optional)
- 2 tablespoons chopped fresh herbs (parsley, coriander, or chives)
- ½ cup all-purpose flour
For Coating:
- 2 eggs, beaten
- 1 cup breadcrumbs (panko or regular)
For Frying:
- Vegetable oil or any neutral oil, enough for deep frying
Instructions
Step 1: Prepare the Mixture
In a large mixing bowl, combine grated cheese, boiled and mashed potatoes, salt, pepper, paprika, garlic powder, and herbs. Mix well until all ingredients are evenly incorporated.
If the mixture is too soft to shape, add a little flour to make it firm enough to roll into balls.
Step 2: Shape the Cheese Balls
Take small portions of the mixture and roll them into uniform balls, about 1–1.5 inches in diameter. Place them on a plate or tray.
Step 3: Coat the Balls
Prepare a coating station with three bowls: one with flour, one with beaten eggs, and one with breadcrumbs.
- Roll each ball lightly in flour, shaking off excess.
- Dip into beaten eggs until fully coated.
- Roll in breadcrumbs to cover evenly.
For extra crunch, double coat by repeating the egg and breadcrumb step.
Step 4: Heat the Oil
In a deep frying pan or pot, heat enough oil to submerge the cheese balls over medium heat. The oil should be about 175°C (350°F).
Step 5: Fry the Cheese Balls
Carefully place a few balls at a time in the hot oil. Fry until golden brown and crispy, about 3–5 minutes, turning occasionally for even color.
Do not overcrowd the pan; this can lower the oil temperature and make the balls soggy.
Step 6: Drain and Serve
Using a slotted spoon, remove the cheese balls from the oil and place them on a plate lined with paper towels to drain excess oil.
Serve hot with your favorite dipping sauces such as ketchup, garlic mayo, ranch, or spicy salsa.
Tips for Perfect Cheese Balls
- Cheese choice matters: Use a combination of cheddar for flavor and mozzarella for stretchiness.
- Keep them small and uniform: This ensures even cooking and a perfect crispy crust.
- Don’t overfill the pan: Fry in small batches to maintain oil temperature.
- Double coating: Makes them extra crunchy and keeps the cheese from oozing out.
- Drain properly: Helps maintain crispiness.
Variations
Cheese balls are highly customizable:
- Spicy cheese balls: Add finely chopped green chilies or chili flakes.
- Herb and garlic: Mix in finely minced garlic and fresh herbs for aromatic flavor.
- Stuffed cheese balls: Place a small piece of jalapeño, corn, or additional cheese inside for a surprise center.
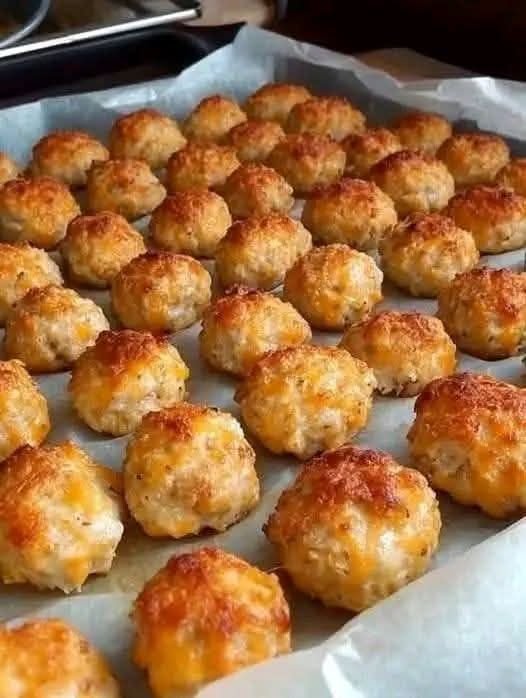
- Baked version: For a healthier option, bake at 200°C (400°F) for 15–20 minutes until golden, turning halfway through.
Serving Suggestions
Cheese balls make an excellent appetizer, snack, or party platter addition. Serve them with:
- Dipping sauces like ketchup, mayo, ranch, or sweet chili sauce
- A side of salad for a balanced snack
- On a cheese and charcuterie board for entertaining
They’re perfect for kids’ parties, game nights, or as finger food for gatherings.
Storage and Reheating
Cheese balls are best served fresh, but you can store leftovers in an airtight container in the refrigerator for up to 2 days. Reheat in an oven or air fryer for best crispiness.
To freeze:
- Freeze uncoated cheese balls in a single layer on a tray.
- Once frozen, transfer to a freezer-safe bag.
- Fry or bake directly from frozen when ready to serve.
Final Thoughts
Crispy, cheesy, and utterly addictive, homemade cheese balls are a snack that everyone loves. They’re versatile, easy to make, and endlessly customizable. Whether you fry them, bake them, or stuff them with extra fillings, these little bites of cheesy goodness are sure to impress.
Perfect for parties, snacks, or comfort food cravings, these cheese balls are crispy on the outside, gooey on the inside, and packed with flavor. Once you try this recipe, they’ll become a regular favorite in your kitchen!